Accidentally deleting records in Salesforce can happen to anyone, but the good news is that Salesforce provides a built-in mechanism to recover these records within a specific timeframe. Whether it’s a crucial account entry, an important contact detail, or a vital opportunity record, Salesforce’s Recycle Bin feature can often save the day.
Step-by-Step Guide to Recover Deleted Records
1. Login to Salesforce
Begin by logging into your Salesforce instance using your username and password.
2. Navigate to the Recycle Bin
Once logged in, locate and click on your profile icon or your name in the top right corner of the screen. From the dropdown menu, select ‘Recycle Bin’.
3. View Deleted Records
You’ll be directed to the Recycle Bin page where you can see a list of recently deleted items. By default, Salesforce displays records deleted within the last 15 days. If you don’t see the record you need, you can adjust the view by clicking ‘All Recycle Bin’ or using search filters.
4. Select Records for Recovery
Scan through the list and check the box next to each record you wish to recover. If you need to recover all items listed, you can use the checkbox at the top of the list to select all.
5. Click ‘Undelete’
Once you’ve selected the records you want to restore, click on the ‘Undelete’ button located either at the top or bottom of the Recycle Bin list. Salesforce will initiate the restoration process.
6. Confirm Restoration
After clicking ‘Undelete’, a confirmation message will appear indicating the number of records restored successfully. Review this message to ensure your desired records have been recovered.
7. Verify Restored Records
Navigate back to the original location within Salesforce (e.g., object tab or list view) where the records were initially deleted from. Confirm that the recovered records are now visible and accessible.
8. Empty the Recycle Bin (Optional)
Once you’ve verified that all necessary records have been recovered, consider emptying the Recycle Bin to free up storage space. To do this, return to the Recycle Bin page and click on ‘Empty Recycle Bin’.
Tips for Effective Record Recovery
- Deleted records are retained in the Recycle Bin for up to 15 days by default, though this retention period can be customized by Salesforce administrators.
- Utilize search filters and adjust the list view settings to locate specific deleted records more efficiently.
- Regularly educate Salesforce users on the importance of reviewing deleted items in the Recycle Bin before permanent deletion.
Ensuring Data Backup and Recoverability with Sesame Software
While Salesforce’s Recycle Bin feature provides a safety net for accidentally deleted records, it’s essential to consider additional measures to safeguard your organization’s data comprehensively. Sesame Software offers a robust solution that integrates seamlessly with Salesforce to enhance data backup and recoverability capabilities.
Key Benefits of Using Sesame Software
- Secure Backup: Sesame Software securely backs up your Salesforce data, including subscriber information, journey engagement data, and more.
- Long-term Data Retention: Ensure indefinite access to historical information with Sesame Software’s retention solutions, which go beyond Salesforce’s native capabilities.
- Effortless Integration: Seamlessly integrate with external storage solutions such as Amazon S3, providing flexibility and scalability for your data management needs.
- Comprehensive Data Protection: Protect critical Salesforce information against accidental deletions, data corruption, or system failures with Sesame Software’s robust backup solutions.
By deploying Sesame Software alongside Salesforce, organizations can proactively mitigate risks associated with data loss and ensure quick recovery of deleted records. This proactive approach not only safeguards against accidental deletions but also supports regulatory compliance and enhances overall data management practices.
How Sesame Software Recovers Deleted Records in Salesforce
- Setup Integration: Connect Sesame Software with Salesforce via secure API integration.
- Schedule Backups: Configure automated backups to capture Salesforce data regularly.
- Access Interface: Log in to Sesame Software and navigate to the Salesforce data management section.
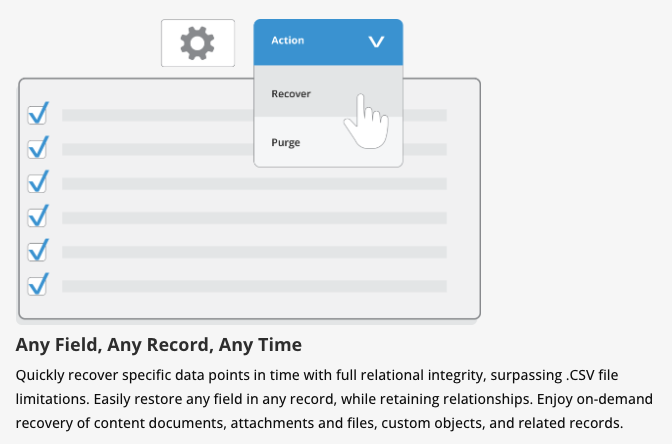
- Select Backup Snapshot: Choose the relevant backup snapshot containing the deleted record.
- Initiate Recovery: Select and recover the deleted record with a few clicks.
- Verify Restoration: Check Salesforce to ensure the record is successfully restored.
Conclusion
Recovering deleted records in Salesforce is a straightforward process thanks to the platform’s Recycle Bin feature. However, for organizations looking to bolster their data protection strategy and ensure comprehensive backup and recoverability, integrating Sesame Software provides an invaluable layer of security and peace of mind.
Explore how Sesame Software can empower your organization with reliable data management solutions that complement and enhance Salesforce’s native capabilities. Protect your valuable Salesforce data today and safeguard your business for the future.
Blogs and Other Resources Related to Salesforce:
Demystifying Metadata: Your Key to a Healthy Salesforce Configuration
Take Full Control of Your Salesforce Backup and Recovery
Can You Rely on Salesforce to Backup and Recover Your Data?
Salesforce Rebranding and How to Protect Your Massive Amount of Marketing Cloud Data
Salesforce Data Protection and Integration for Financial Services
Still Trying To Figure Out Where To Start?
Need help navigating your data management projects? Ready to safeguard your Salesforce data? We can help. Schedule a demo of Sesame Software today to learn more about our solutions and start enhancing your data backup strategy today.